
Adding a Bank Account
If you want to pay with a bank account, or withdraw funds in your account balance, you must add a bank account to your verified Amazon Payments Personal Account by using one of the following methods:- Instant Account Verification
- Random Deposits
- Secure Document Upload
- Fax
Adding and Verifying a Personal Bank Account by Using Instant Account Verification
Amazon never records your credentials in any database, cookie, or browser session. We simply pass your credentials through to your bank to verify the account. When the account is verified, the credentials are no longer available.With the instant account verification method, you provide your bank account login credentials through Amazon's secure web site, which Amazon Payments uses to verify your ownership of the bank account. Your credentials are never stored or read by Amazon. If you prefer to verify your account without using your bank account login credentials, you can do so using the random deposits verification method (see Adding and Verifying a Personal Bank Account Using Random Deposits, below).
To add and verify a personal U.S. bank account by using Instant Account Verification, follow these steps:
- Log in to your Amazon Payments account.
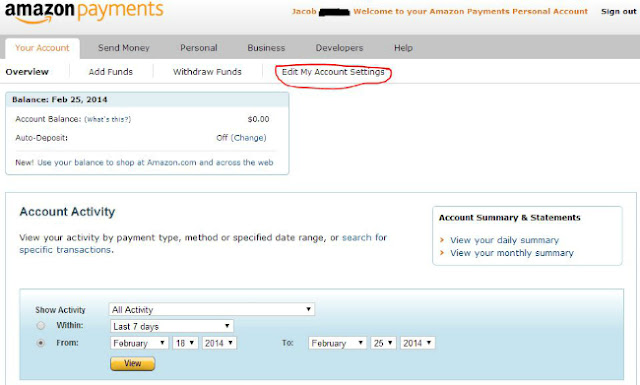
- Click the Edit My Account Settings link.
- In the Payment Settings section, click the Add bank account link.
- In the Bank Account Holder Name text box, enter the name of the account owner as registered with the bank.
- In the Routing Number text box, enter the bank's routing number (from the lower-left portion of a check). Amazon Payments will attempt to match the number to known banks. If the number does not match any known banks, a message will appear requesting that you re-enter the number or try a different bank routing number.
- In the Account Number text box, enter the bank account number (from the lower-left portion of a check).
- Choose the Personal Bank Account radio button. If you choose Business Checking Account, you must upload or fax a current bank statement for verification. For more information, see Adding a Business Bank Account to Your Account.
- Provide a valid driver's license or state-issued identification number and select the issuing state. If you don't have a driver's license number or state-issued identification number, then please add your bank account as a Business Bank Account.
- Select the billing address that is associated with the bank account or enter a new one.
- Click Continue.
- If your bank is enabled to support Instant Account Verification, you will see two options: Instant Verification, and Verify with Bank Deposits. Click the Instant Verification radio button. The fields in this form vary according to the security methods that are enabled by your bank. Optional fields that are requested by your bank may be included.
- Enter the information for your bank account in the spaces provided.
Provide values only for the optional fields that you have already
provided to the bank.
Note: Amazon does not save your sign-in information, but only uses it to verify your ownership of the bank account. - Click the Verify Instantly button. Amazon Payments attempts to verify the account by using the credentials that you provided. Depending on the security options that you have set with your bank, you might be prompted for additional security questions. This can take several minutes, so please wait for the verification to complete.
When complete, and your account has been verified, you can begin using it right away.
Note: Your Amazon Payments account has a lifetime limit of 10 bank account payment methods (there is no such limit on the number of credit cards that can be associated with your account). If you have had 10 bank accounts with Amazon Payments already on the same account, you cannot add more, even if one or more of the 10 is no longer active.
Adding and Verifying a Personal Bank Account by Using Random Deposits
With the random deposits method of account verification, Amazon Payments will make two small test deposits of less than $1.00 into the bank account you provide. When the deposits appear in your bank account (generally within 5-7 business days, not including weekends or holidays), you must return to your Amazon Payments account to verify the deposit amounts. For faster verification, see Adding and Verifying a Personal Bank Account Using Instant Account Verification, above.To add a personal U.S. bank account, and verify it by using random deposits, follow these steps:
- Log in to your Amazon Payments account.
- Click the Edit My Account Settings link.
- In the Payment Settings section, click the Add bank account link.
- In the Bank Account Holder Name text box, enter the name of the account owner as registered with the bank.
- In the Routing Number text box, enter the bank's routing number (from the lower-left portion of a check). Amazon Payments will attempt to match the number to known banks. If the number does not match any known banks, a message will appear requesting that you re-enter the number or try a different bank routing number.
- In the Account Number text box, enter the bank account number (from the lower-left portion of a check).
- Choose the Personal Bank Account radio button. If you choose Business Checking Account, you must upload or fax a current bank statement for verification. For more information, see Adding a Business Bank Account to Your Account.
- Provide a valid driver's license or state-issued identification number and select the issuing state. If you don't have a driver's license number or state-issued identification number, then please add your bank account as a Business Bank Account.
- Select the billing address that is associated with the bank account or enter a new one.
- Click Continue.
- Click the Verify with Bank Deposits radio button, and then click the Verify with Bank Deposits button.
Note: Your Amazon Payments account has a lifetime limit of 10 bank account payment methods (there is no such limit on the number of credit cards that can be associated with your account). If you have had 10 bank accounts with Amazon Payments already on the same account, you cannot add more, even if one or more of the 10 is no longer active. - When the random deposits do appear (generally within 5-7 business
days, not including weekends or holidays), return to your Amazon
Payments account to verify the deposit amounts:
- Log in to your account.
- Click the Edit My Account Settings link.
- Click Manage your bank accounts.
- Select the bank account that you want to verify.
- Click the Enter deposit amounts button for the account that you want to verify.
- In the window that appears, enter the random deposit amounts in the spaces provided. You must also answer one of the two security questions that you answered when setting up your account.
- Click the Submit button.
- If the random values match, and you answer the security question correctly, the verification process is complete. If after several attempts you are not successful, you might be able to verify your account by using Instant Account Verification, as described above.